Purchase and Use Resource
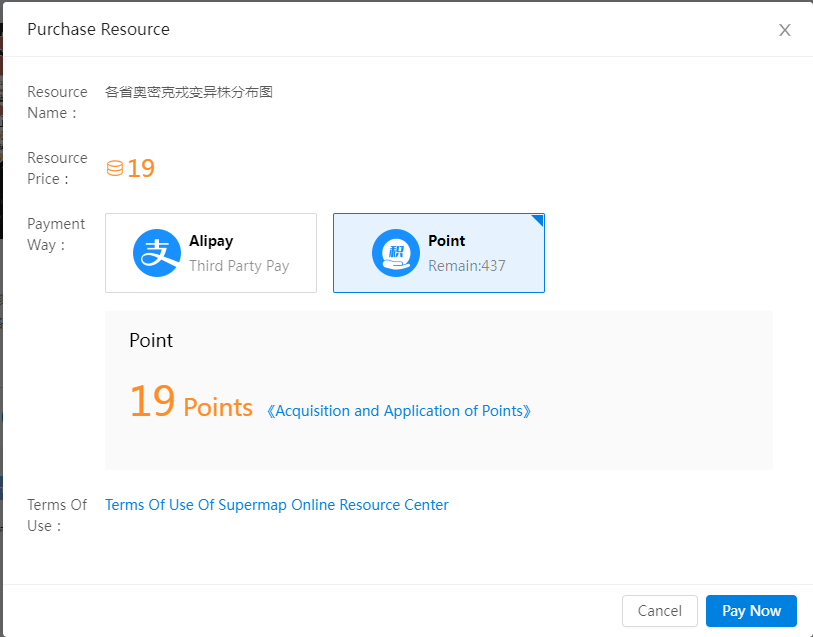
You can view and purchase resources in 'Resource Center' > 'Public Resource'. It supports to purchase resources by points or cash, the available types of resources include Data resources, Service resources, Maps, MapDashboards, DataInsights, and Scene resources. The platform also provides some free resources for online use.
You can find purchased resources in 'My Resource' > 'My Purchase'. 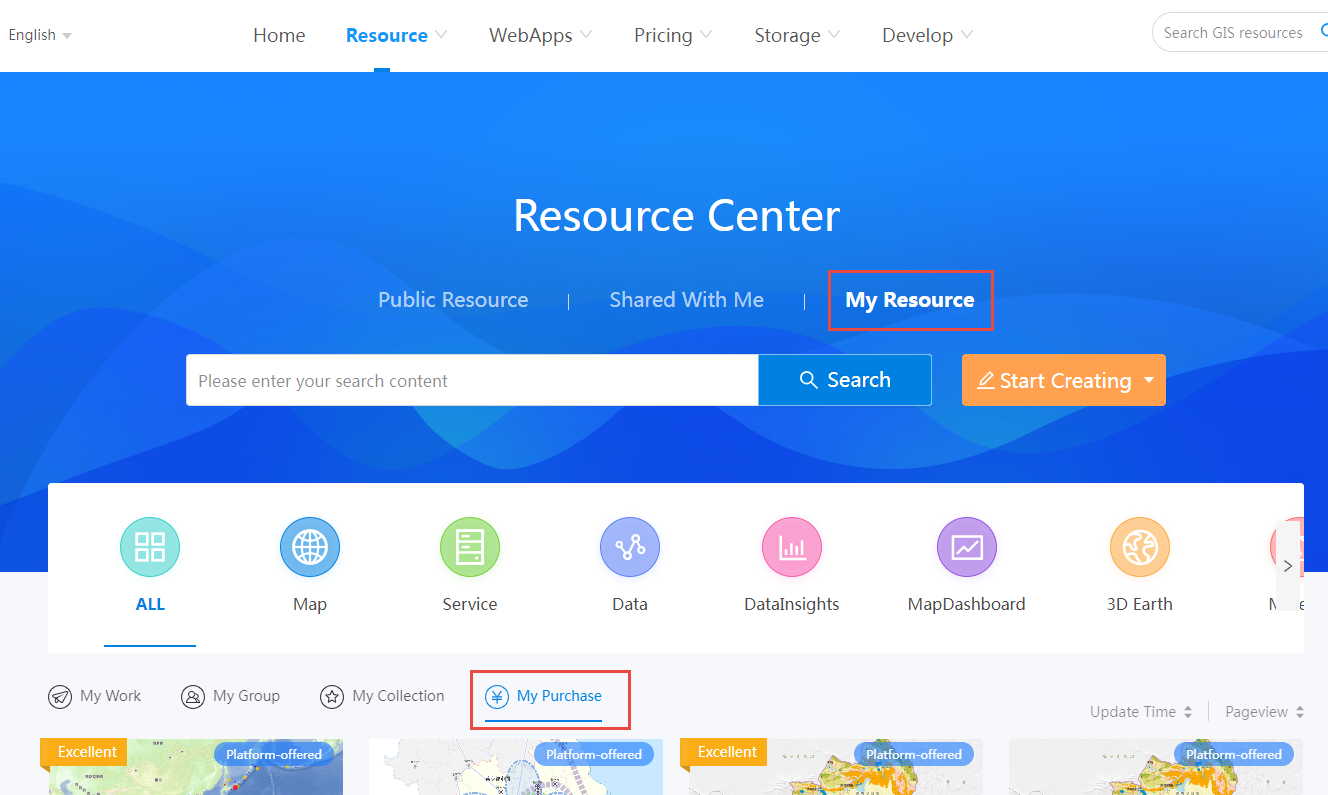
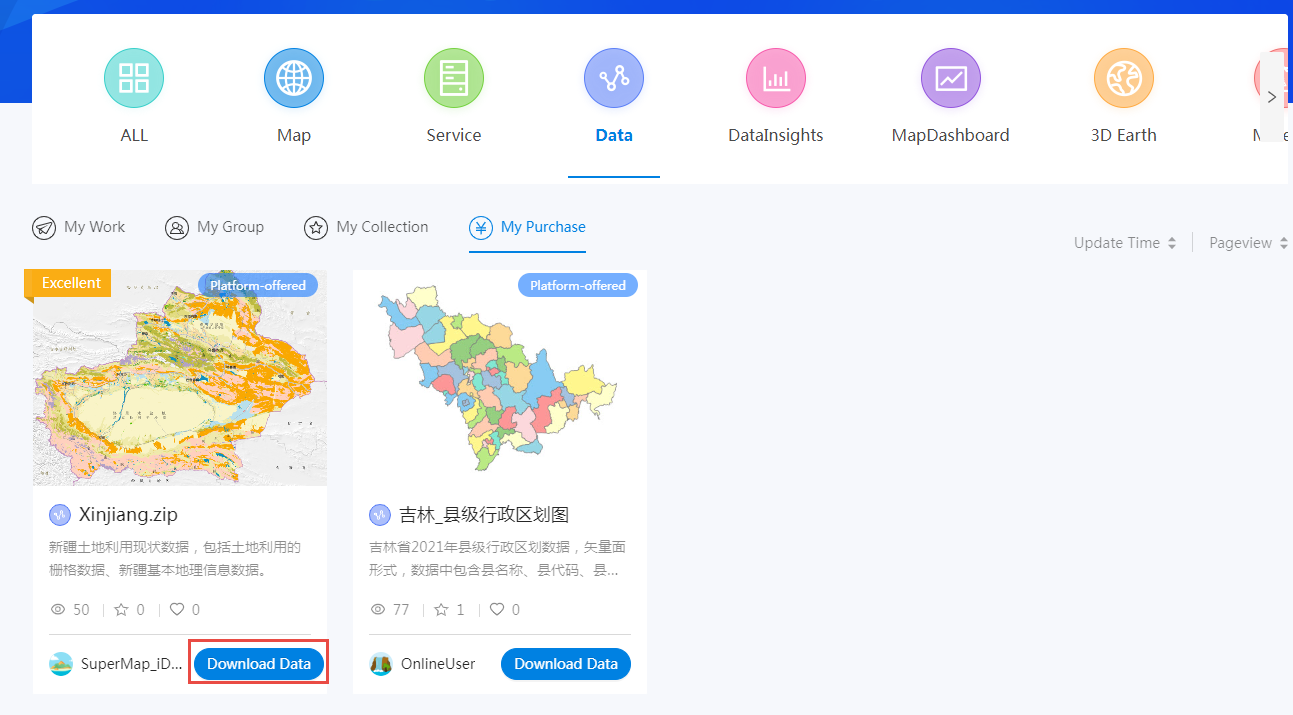
Data
After purchasing data resources, you can download and use them directly.
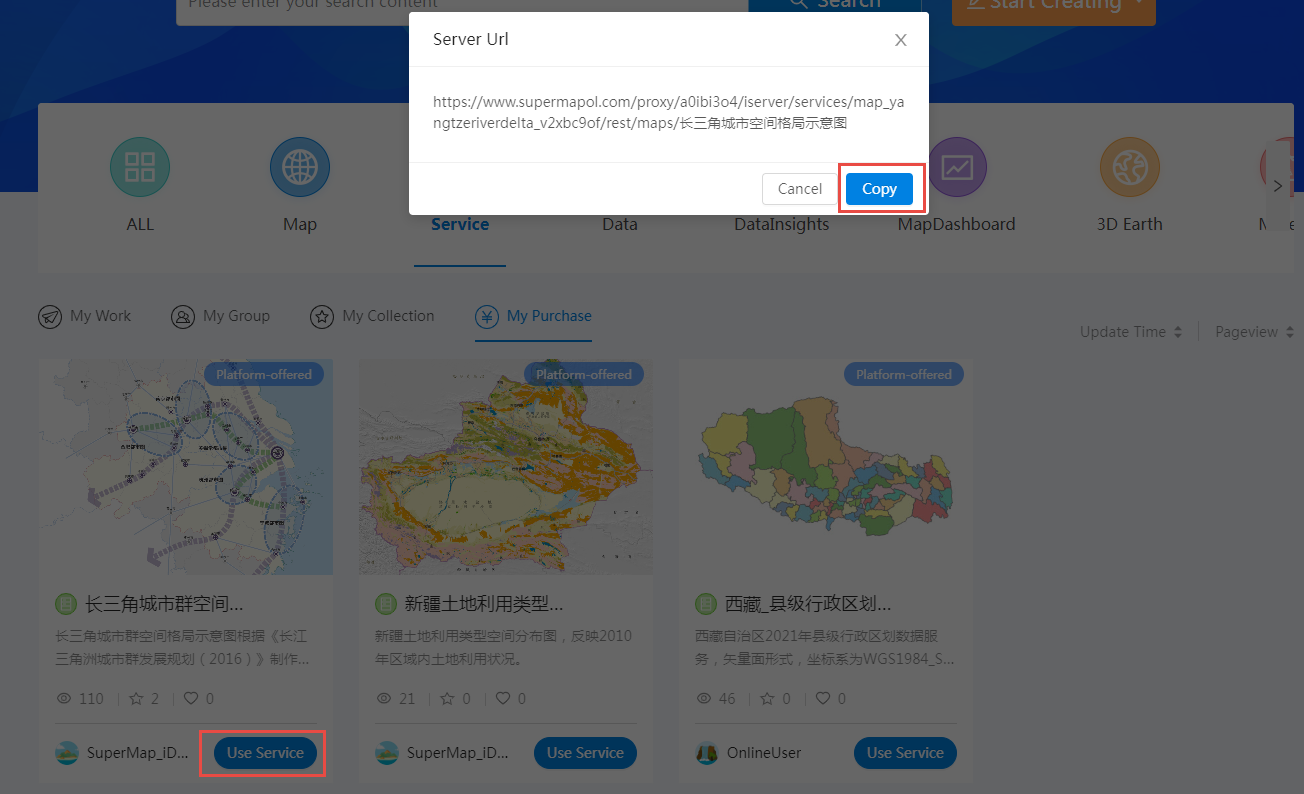
Services
Click 'Use Service' to copy the service address and use the purchased service resources. Here we provide three ways to use your service resources after purchasing them.
1 Use Service Resources in WebApps
Add services to WebApps to build your own GIS resources, click to learn more about WebApps and how to use them.
2 Use Service Resources in SuperMap iDesktopX
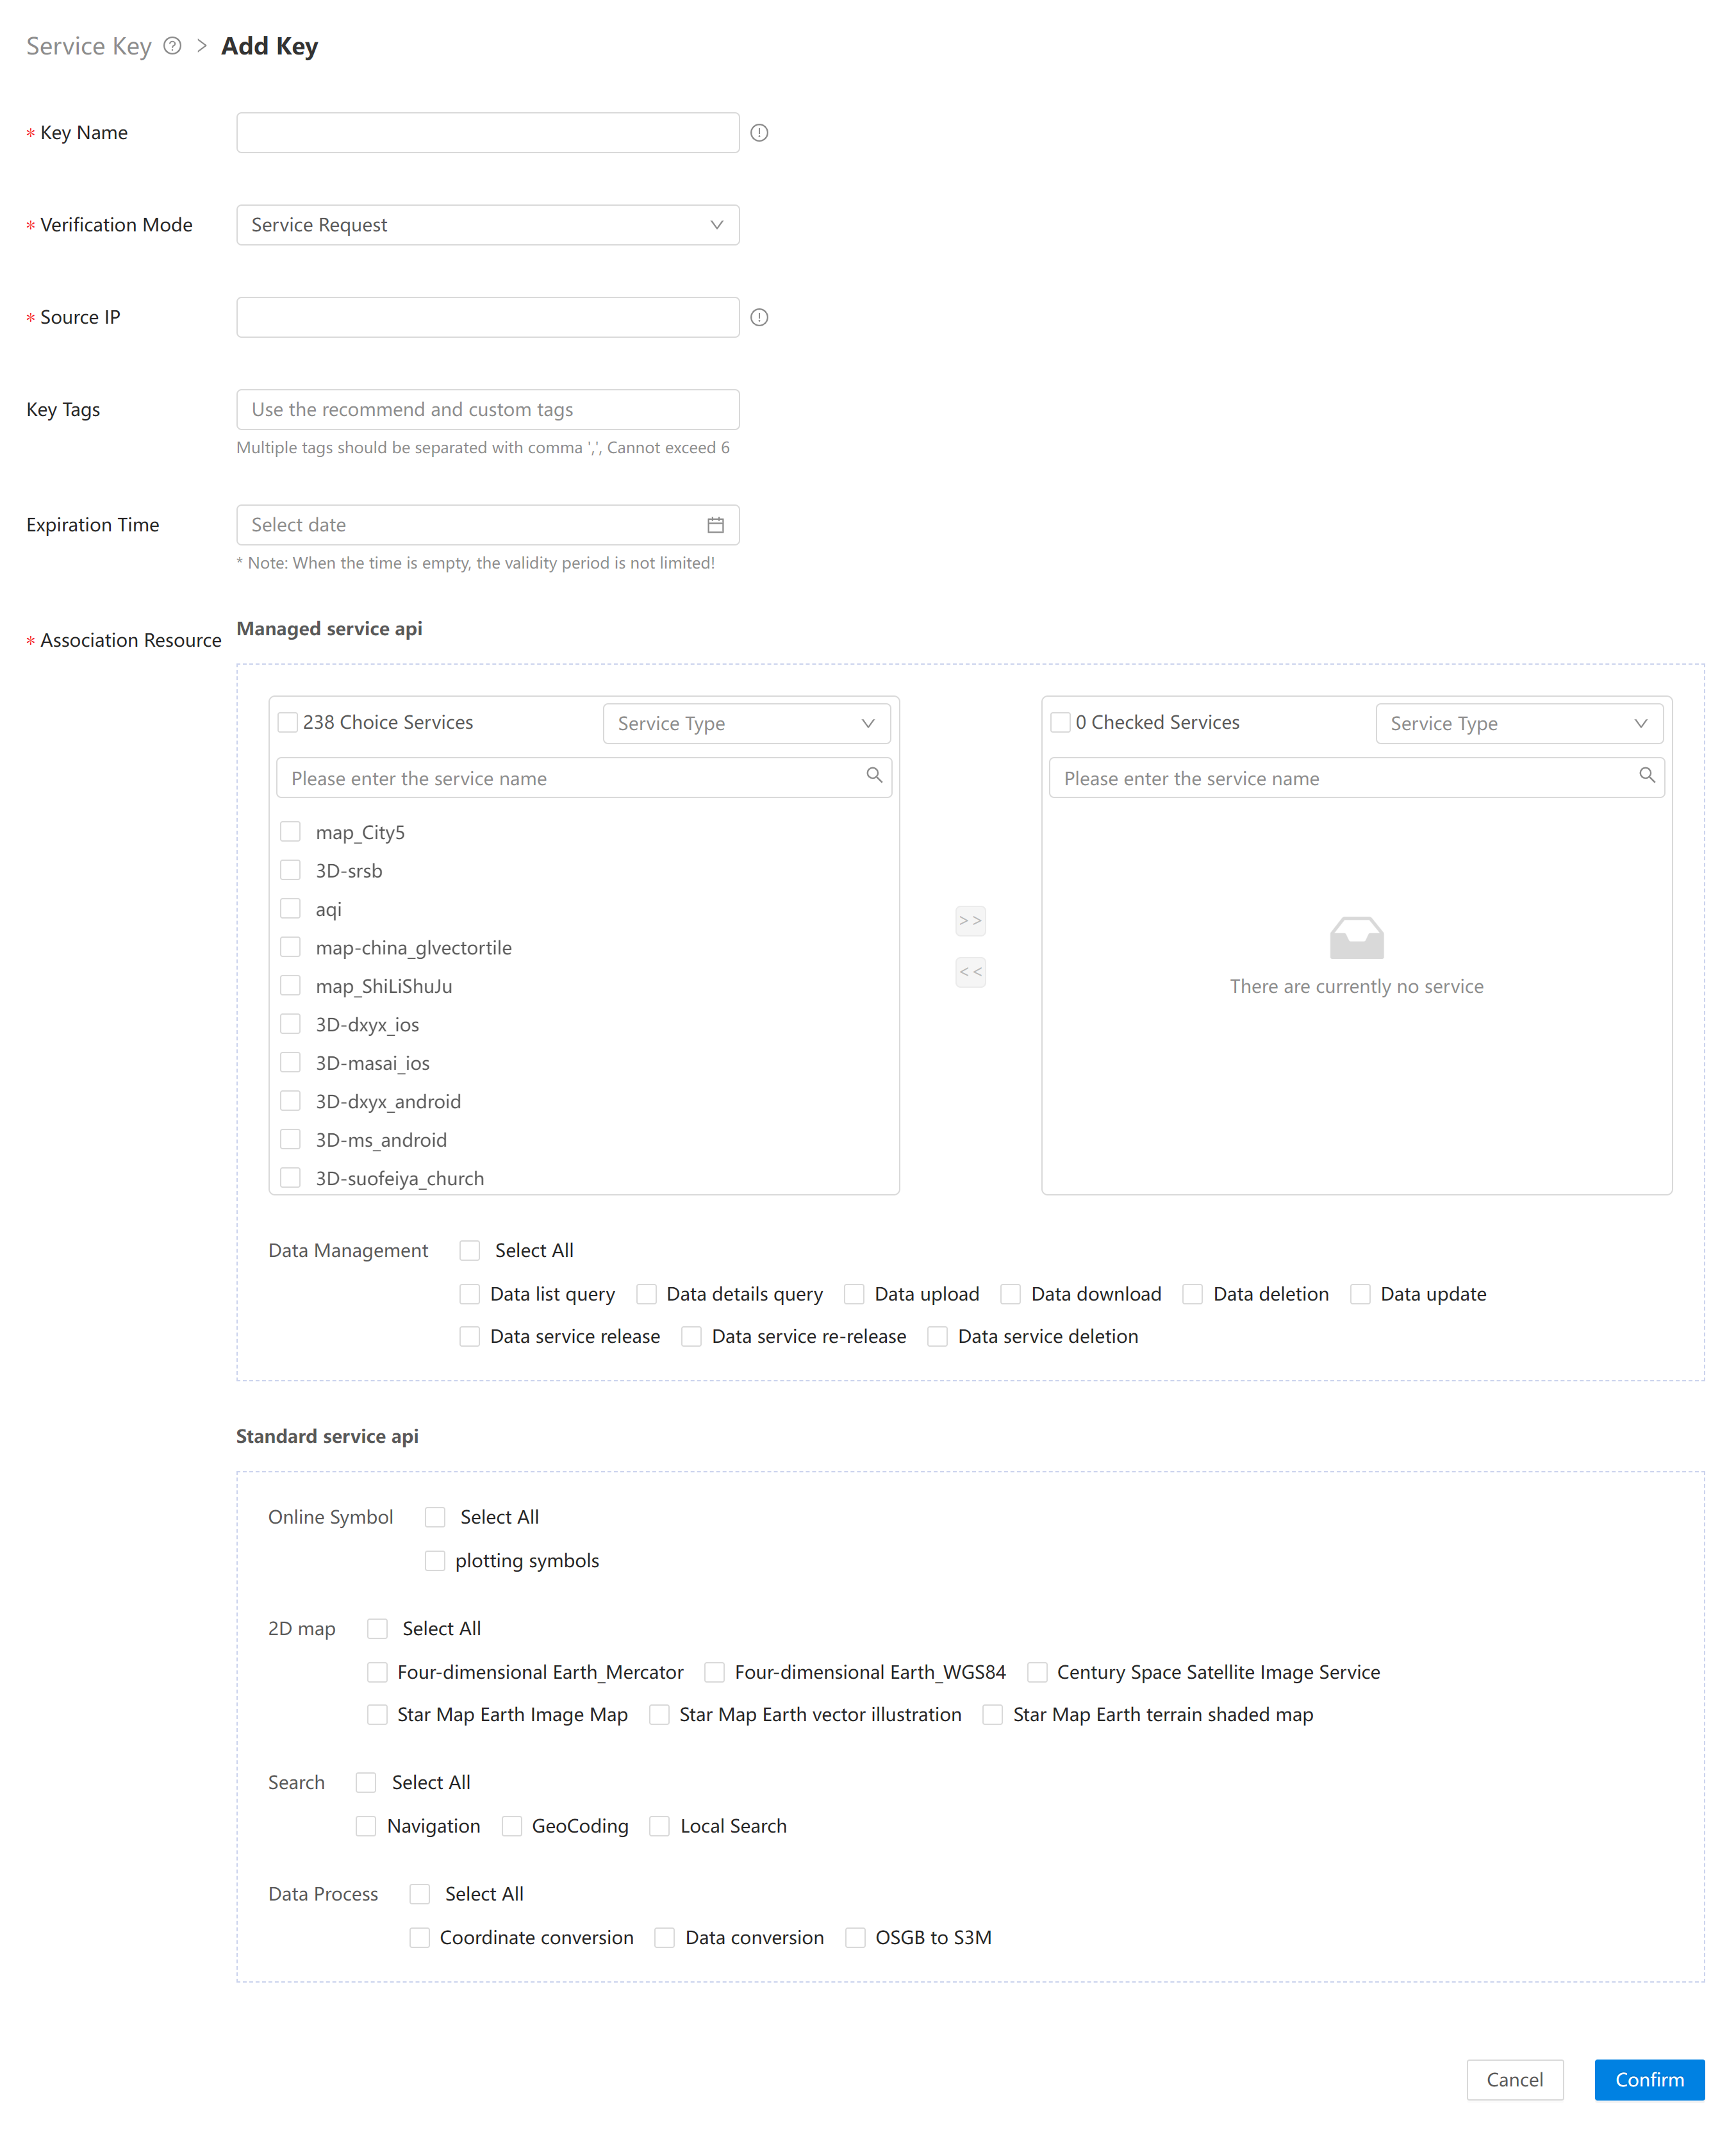
Firstly, you need to create a Key to improve the security of your service.
Next, open SuperMap iDesktopX, click 'Online' > 'Online Map' > 'Custom' > iServerREST, and fill in the service address according to the following format to load your purchased resources.
Service address:
https://<server>:<port>/iserver/services/{component}/rest/maps/{mapName}?key=paste your key here
Sample:
https://www.supermapol.com/proxy/7eu4miel/iserver/services/map_zhibozhongguo_anyjruf8/rest/maps/%E7%9B%B4%E6%92%AD%E7%82%B9%E5%9C%B0%E5%9B%BE?key=paste your key here
Note: The service address copied in SuperMap Online is only up to the rest level. But in SuperMap iDesktopX, the service address needs to be up to the mapName level (the URL need to display the specific map name). So after opening the copied address on SuperMap Online, it needs to open two levels down.

3 Use Service Resources in Your Own WebGIS Applicatios
Firstly, you also need to create a Key. When you use service resources using JavaScript. you can refer to the following code. Click to learn more about how to use map.
<!DOCTYPE html
<html lang="en">
<head>
  <meta charset="UTF-8">
  <link href="https://cdn.jsdelivr.net/gh/openlayers/openlayers.github.io@master/en/v6.4.3/css/ol.css" rel="stylesheet" />
  <link href='https://iclient.supermap.io/dist/ol/iclient-ol.min.css' rel='stylesheet' />
  <script type="text/javascript" src="https://cdn.jsdelivr.net/gh/openlayers/openlayers.github.io@master/en/v6.4.3/build/ol.js"></script>
  <script type="text/javascript" src="https://iclient.supermap.io/dist/ol/iclient-ol.min.js"></script>
  <title>Use map services</title>
</head>
<body style=" margin: 0;overflow: hidden;background: #fff;width: 100%;height:100%; position: absolute;top: 0;">
<div id="map" style="width: 100%;height:100%"></div>
<script type="text/javascript">
  var map, url = "https://www.supermapol.com/proxy/gwofdhzc/iserver/services/map-geovis-vec-v2/rest/maps/GEOVIS_Vec";<!--the address of the REST map service you used-->
  map = new ol.Map({
      target: 'map',
      controls: ol.control.defaults({attributionOptions: {collapsed: false}})
          .extend([new ol.supermap.control.Logo()]),
      view: new ol.View({
          center: [0, 0],
          zoom: 2,
          projection: 'EPSG:3857',
          multiWorld: true
      })
  });
  SuperMap.SecurityManager.registerKey(url,'ABABABABABABABABABABAB');<!--you need to replace the string with the secret key that you applied for the service-->
  var layer = new ol.layer.Tile({
      source: new ol.source.TileSuperMapRest({
          url: url,
          wrapX: true,
          serverType:'ONLINE'
      }),
      projection: 'EPSG:3857'
  });
  map.addLayer(layer);
  map.addControl(new ol.supermap.control.ScaleLine());
</script>
</body>
</html>
Map, MapDashboard, DataInsights and Scene
For the purchased Map, MapDashboard, DataInsights and Scene resources, you can click 'Use Template' for secondary creation. After clicking 'Use Template', The resource will be automatically opened in the corresponding WebApp. The completed creation resources will be saved to 'My Work'.
How to create resources