Publish Your Own Map on SuperMap Online and use it in Your Project
As for the GIS research and development, GIS has two specific parts: geographic data and well-designed map. Due to the cost and real efficiency, the capture of geographic data requires to occupy lots of resources in the development of the project. Meanwhile, how to design a map is also a high threshold, which calls for much man powers. Faced with those problems, SuperMap Online provides users an easy and high-efficient solution. In this chapter, we will introduce you how to focus on your business data only in your project, and quickly integrate SuperMap Online map into your project.
Configure your business data in SuperMap iDesktop
SuperMap iDesktop is a professional GIS application which can be used for converting your business data into the data formats that SuperMap Online supports.
SuperMap iDesktop can be downloaded from this URL(with 90 days' trial)
1. Load your GIS data in iDesktop
After download and install iDesktop, you can click "Files", "Sample Data" to see all the sample data. In this example, we will use [京津地区土地利用现状图]. Open this map by double click on map name.
2. Check GIS data in iDesktop
Click on Maps on the left panel to see all the maps involved in Jingjin workspace. Choose the second map "京津地区土地利用现状图" and double click to open it. The structure is shown as follows. 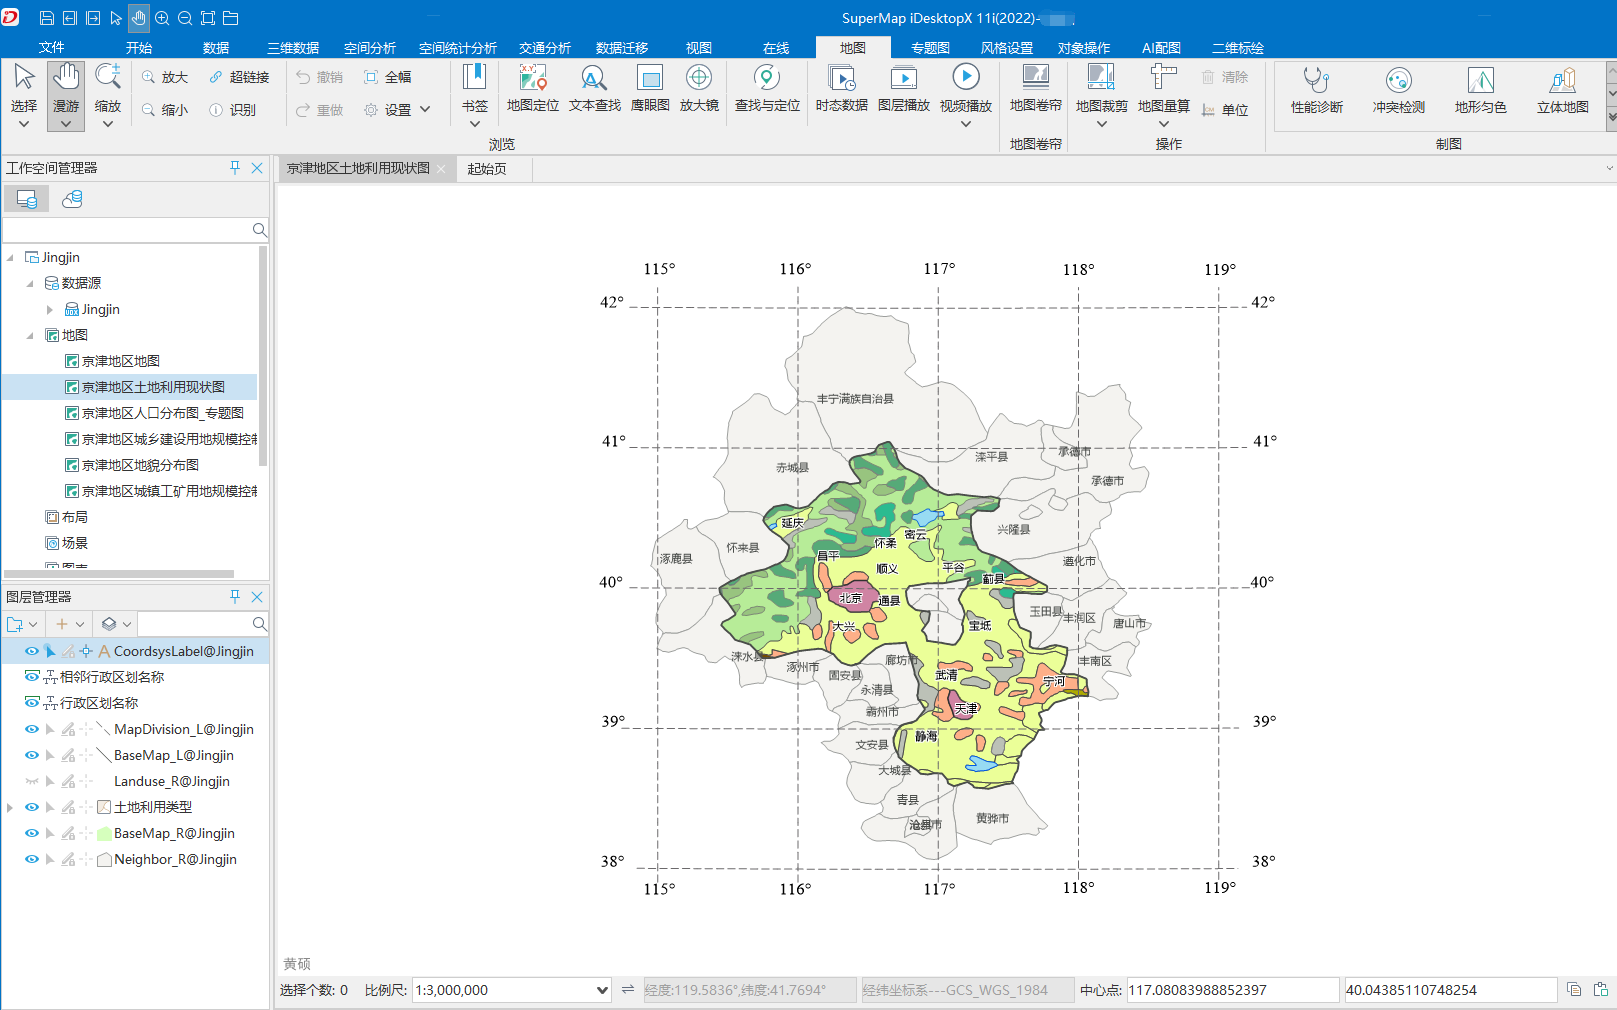
3. Set Dynamic Projection for the map
Next, you should set the dynamic projection for the map.
Q: Why to set dynamic projection for the map?
A: SuperMap cloud map provided by SuperMap Online uses Sphere Mercator coordinate system, while JingjinMap in iDesktop uses WGS 1984 coordinate system. In order to correctly overlay the two maps together, you should dynamically project JingjinMap to Sphere Mercator coordinate system.
Q: What is dynamic projection?
A: Dynamic projection in SuperMap iDesktop transforms the map projection in an instant way instead of changing the real coordinate system of the dataset. For details, please see SuperMap iDesktop Help document.
Here are the steps for setting dynamic projection:
- On the Ribbon of iDesktop, select "Map" tab, and click on "Map Property" button. (Or right click on the map window, and select "Properties").
- After you open Map Property, you can see the panel on the right. Then, you should set the following properties in turn:
- Check the "Dynamic Project"
- Click on the "Project Settings" button, and select "Sphere Mercator" from the list.
- Click on "Apply".
If the map is projected dynamically, the map will not be rightly displayed due to the change of the scope. You can click "EntirImage" button to see the whole map.
4. Save the map and workspace
Switch to the Map Properties window, select the Bounds tab, and uncheck Custom Full Extent.
Next, save the map and the workspace to finish the data configuration.
Finally, compress the workspace file (.smwu) and the data files (.udb, *.udd) into Zip file for the future use in SuperMap Online.
Publish data on SuperMap Online
1. Open SuperMap Online in your browser and log in.
Access this URL http://www.supermapol.com, sign in with your SuperMap account.
2. Click "My Contents" on the top menu
Now we click "My Contents" and "My Data" tabs on the top menu and enter the data page. Then Click "Upload data" button and choose your own data(with format *.zip).
Check "I have read and agree with SuperMap Online GIS Platform Protocol", and click OK to start uploading.
3. Publish the uploaded data to REST map service
After you upload the data, you can see the data in the list. In order to make the data overlay the SuperMap cloud map, you should publish the data to the map service. Click on the first button, and choose to publish as ** REST map service**.
4. View the published REST map service
After the REST map is published, click on the first button View to see the published service URLs.
In the popup page, you can see the published REST service URL:
e.g., 京津地区土地利用现状图 is configured in iDesktop (URL):
www.supermapol.com/iserver/services/5uvy0vh9/rest/maps/京津地区土地利用现状图
Finally, write down the published REST map service URL for the future use in SuperMap Online for map making.
Mapping online
1. Open online mapping editor
In the previous page, switch to the tab My Map, and click on the green button Create A Map.
2. Create a base map layer in editor
In the map editor, switch to the tab Base Map, and choose "SuperMapCloud Map", then you can see the editing area on the right where the SuperMap cloud map is successfully displayed.
3. Add web layer to the layer manager
Next, find the REST map service URL which you saved previously, and try to overlay it to the SuperMapCloud map. Click "Layers" and "Add Layers", then choose "Add a web layer".
4. Add REST map service
Input the REST map service URL you saved previously in the popup dialog. Click OK to finish adding and you will see the layer in the map view.
5. Save map
Finally, click on Save, and set the map name, bounds, etc. to finish the online map configuration.
6. View the saved map
Open SuperMap Online homepage, switch to My Contents, Open the tab My Map, and you can check the previous step: save the map.
Use the map in your project by SuperMap Online API
1. Get a key
If you want to use the configured map in your project, you should apply for the authorization key first.
Open SuperMap Online homepage, switch to My Contents, Open the tab My Keys, and you can fill up the following contents:
- Application name: Fill the application name. Note, illegal characters are now allowed.
- Application type: Take Service Request as an example, it is a common calling method. In addition, there are other two requests: access site and access mobile terminal.
- Service: Choose the service type expect basic service.
- My Service: Select the published service, i.e., 京津地区土地利用现状图 service.
Click the button OK.
2. View your keys.
In the top menu, go back to "My Keys" page, and you can see the Keys you applied for
3. Create an project and use map services
Create a blank html file, and input the following codes to replace the key you have applied for:
<html>
<head>
<meta http-equiv="Content-Type" content="text/html; charset=utf-8" />
<title>Jingjin Land Use Map</title>
<script src='http://www.supermapol.com/demos/DynamicProjection/libs/SuperMap.Include.js'></script>
<script type="text/javascript">
var map, layerBaseMap,layerJingjing;
var urlJingjin="http://itest.supermapol.com/iserver/services/ozx4t0pi/rest/maps/京津地区土地利用现状图";
SuperMap.Credential.CREDENTIAL = new SuperMap.Credential("Replace with your key", "key");
function init(){
    map = new SuperMap.Map("map",{controls: [
    new SuperMap.Control.ScaleLine(),
    new SuperMap.Control.Zoom(),
    new SuperMap.Control.MousePosition(),
    new SuperMap.Control.Navigation({
        dragPanOptions: {
        enableKinetic: true
        }})], allOverlays: true});
        layerBaseMap = new SuperMap.Layer.CloudLayer();
        layerJingjing = new SuperMap.Layer.TiledDynamicRESTLayer("LandMapUse", urlJingjin, {transparent: true, cacheEnabled: true},{projection:"EPSG:3857"});
        layerJingjing.events.on({"layerInitialized": addLayer});
        layerJingjing.setOpacity(0.6);
}
function addLayer(){
    map.addLayers([layerBaseMap,layerJingjing]);
    map.setCenter(new SuperMap.LonLat(12957390.81712, 4855580.62445), 8);
 }
</script>
</head>
<body onload="init()">
</div>
<div id="map"></div>
</body>
</html>
4. Save Html file, and view the map on browser
Save the code as an html file, and view the map on your browser. In this case, you can see 京津地区土地利用现状图 you saved.